Wednesday, September 20, 2017

Gesture Drawing

Think of gesture drawings not only as a warm up to get you going, but to also help you plan out a drawing or composition. This is especially useful for figure drawings and for drawings where you need to capture the essence of your subject. 


Though gestures capture the essence of your subject, they don't necessarily have to be able to be viewed as a coherent piece--it's ok for them to be indiscernible scribbles, just as long as it captures the motion of your drawing.


You can also combine gesture drawing with outline drawing to get more detail, while still maintaining a loose drawing style. Below are preliminary sketches by Honore Daumier for his painting The Carnival Parade. See how using gesture drawings can help capture the movement and expression of your subject?

Study for the Parade by Honore Daumier
Study for Parade 2 by Honore Daumier
The Carnival Parade by Honore Daumier

Below is another example from Daumier showing a more tightly controlled, but still loose gesture drawing.
Study of a Terrified Woman by Honore Daumier

Friday, January 22, 2016

Beginning Course Syllabus

Fan Lee Warren Laney College
Art Department Fall 2017
Classroom AC125 Wed. 12:00 pm-5: 50 -3: 50 pm
Office Location: AC125A Office Hours: Wed. 11:00am-12:00 pm
Office Phone: 510 464 3266 Email: fwarren@peralta.edu

Drawing Composition

Art 20- Beginning

Course Syllabus

Drawing not only develops hand -eye coordination, it teaches one to really observe, to see, as nothing else ever will.  Nancy Marulewicz
Course Description:
This is an introductory course that explores the basic principles and elements of composing drawings using a variety of exercises and techniques. The exploration of line, value, form, shape, spatial development and composition will be emphasized. Drawings will be created from observation and exploration of still life, interiors, landscapes and the figure.

Course Objectives:
1. The class goals include learning to allow the creative part of our minds to create more freely, while learning basic techniques of drawing.

2. This course will explore theory and the practice of drawing and composition.

3. Beginning problems will be structured into fundamentals exercises.

Student Learning Objectives:
1. Student will be able to comprehend and execute the basic principles of composing a drawing using traditional drawing techniques.

2. Students will be able to observe and illustrate 3 dimensional objects using light and shadow.


4. Students will have a portfolio of drawing for educational assessment and student exhibitions.

Class Procedures & Policies:

Assignments
Drawing assignments will be given weekly. You will be required to use time in class and outside of class to complete the assigned work. The more you draw the more you will learn and build your drawing skills. Assignments are given with a specific due date. If the class is working more quickly or slowly the due date will be revised. If you have any questions about an assignment or don’t understand the instructions… please ask questions.

Class Blog
http://drawingandcomposition.blogspot.com
The class blog contains information and demonstrations about each drawing assignment.

Critiques
On the day an assignment is due we will have a critique. It is required that you attend and participate in all critiques. Do not miss critiques, even if you have not finished an assignment. It is mandatory to put up your work to receive credit for your participation. Any and all critiques are about the work. It is your opportunity to talk, ask questions and receives feedback about your drawings from your classmates and instructor. It is important to hear what is said about other work and that you offer your own ideas. Private conversations or texting during critique are inappropriate. If you want to rework a drawing based on comments offered during critique, you are welcome and encouraged to do so. You can resubmit work at any time to try and improve your grade.

Participation and Attendance
You are strongly encouraged to attend all classes as participation crucial to your success as well as your grade. This is a studio class and drawing is a hands on activity. What you miss can never really be made up. If you miss a class, you are responsible for finding out what material was covered and making up any assignments. This means coming directly to the instructor and/or speaking with a classmate who understands instructions completely. Come to class on time. The accumulation of 3 occurrences of tardiness (10 minutes late or more) or early departures (10 minutes early or more) will be the equivalent of (1) absence. Classes often begin with a lecture, demonstration or important announcements. Please be on time and expect to stay until the end of class. You are permitted one 15 minute break during the class period. Please make sure not to take this break during a critique, discussion and/or demonstration. An accumulation of 8 or more absences will result in failure.

Grading:

Grades are based on your ability to meet the following criteria:

1.Quality of your work - effort and enthusiasm visible in your work, timely completion and thoughtful presentation of your work and the careful organization of your work for midterm and final reviews.
Excellent, inspired” work is graded with an A
Good” work is graded with a B
Average” work is graded with a C
2. Verbal and physical participation in class and critiques.
3. Preparedness for the completion of assignments and class work.
4. Regular attendance: Each absence after the 3 allowed absences reduces the overall grade
by a third of a point: (for example: An A becomes an A- an A- becomes a B+)
5. Evidence of growth and improvement- including effective demonstration of techniques and concepts discussed and/or demonstrated.
Midterm Review
At midterm, your work will be reviewed to access your work / progress. Please keep all of your work for this review.

Final Critique

There will be a mandatory final critique at the end of the term. Your final drawings should be complete and ready for presentation for this critique. During this critique we may have a class potluck.


Course Schedule

Introductions- Review Syllabus and Materials list HW: Buy materials

Slide Lecture: Drawing and Composition
Compositional Sketching and Contour Line Drawing HW: Continue and complete: Contour Line - bring an object to draw for next class

Slide Lecture: Critique: Blind Contour Line
Lecture: Composition: Line
Explore Lines: have an object to draw HW: Continue and complete: Line Exercise

Slide Lecture: Critique: Out line/ Gesture
Lecture: Composition: Gesture
Explore Lines: Hatching and cross from previous drawings HW: Continue Gesture drawing


Critique: Hatching &Cross Hatching Exercise
Lecture: Composition using 3 or more line technique
Compositional Play- Abstraction HW: Continue and complete assignment from class


Critique: Composition using 3 or more line technique
Lecture: Negative Space
Negative Space-charcoal drawings in class exercise HW: Continue negative space sketches for final drawings- bring in photographic resources

Critique: Negative space sketches
Begin Final Negative Space Drawings-
HW: Continue negative-have a photograph as a resource


Critique: Negative space drawing
Continue Negative space Drawing


Midterm Reviews: Individual Presentation of Completed Assignments

Slide Lecture: Value and Form
Value Scale Exercise HW: Continue Exercise

Critique: Value Scale Exercise
Value and Shading Drawing of a Still life HW: Continue Drawing


Critique: Value Drawing of a Still life
Slide Lecture: Tonal Ground, Subtractive Charcoal Drawing
Value and Form: Subtractive Charcoal Drawing in class still life
HW: Subtractive Charcoal Drawing,


Critique: Value Drawing of a Still life
Slide Lecture: Tonal Ground, Subtractive Charcoal Drawing
Value and Form: Subtractive Charcoal Drawing in class still life
HW: Subtractive Charcoal Drawing,

Critique: Subtractive Charcoal Drawing
Continue Value and Form: Subtractive Charcoal Drawing
HW: complete subtractive homework
Assignment

Critique: Subtractive Drawings
Lecture: Drawing the Light, Drawing with White
Drawing the Light, Drawing with White in class drapery still life
HW: White object on light colored or brown paper
Last day to turn in missing and/or extra credit work

FINAL CRITIQUE and CLASS POTLUCK

Drawing and Composition Materials List
Beginning-Continuing

7 -20 sticks * Vine Charcoal SOFT
7-15 sticks * Vine Charcoal MEDIUM
3 -5 sticks * Compressed Charcoal (soft)
1 each * “General’s” Charcoal pencil HB AND 6B
1 only * Graphite pencil 2B or regular #2 pencil
1 only “Cretacolor” or “Prismacolor” Woodless Graphite 8 or 9B
1 only “Derwent” white drawing pencil (Chinese white)
3 pack “Alphacolor Soft Pastels” – White
1 each Medium blending stick/stump
1 only Chamois Cloth
1 only * “Design” Kneaded Rubber Eraser
2 each * “Magic Rub” Erasers
1 only 1”wide tape (masking or other)
1 pad 18”x 24” White Drawing Paper (24 sheets or more)
1 pad * 18”x 24” Newsprint (rough texture, 100 sheets or more)
(“Ingres”, “Fabriano Tiziano”, “Mi Tientes”)
1 only * Masonite Drawing Board

Optional,
(Very Useful)

1 of each “Prismacolor NuPastel” (advance)
2 sheets 19”x25” (MEDIUM TONE) colored drawing paper (advance)
1 only Click Eraser assorted sizes (staedtler or sanford)
1 only Spray Fixative or Hairspray
1 set “Alphacolor”Pastels assortment of 12 colors
Several soft cotton rags
1 only good scissors
1 only * apron / other covering for keeping clean
1 sheet sand paper (60 – 120 grit)
Extra sheets higher quality colored or textured papers
1-roll * paper towels

Recommended locations to purchase supplies:

Dick Blick / The Art Store 811 University Avenue Berkeley 510 486 2600

5301 Broadway Oakland 510 658 2787

Artist and Craftsmen Supply 2573 Shattuck Avenue Berkeley 888 217 3150
Utrecht Art Supplies 1909 University Ave Berkeley 510 649 0808

Wednesday, September 24, 2014

Vocab and Such

Here are various art terms, vocab, and examples that will help you to better understand and communicate during critiques and discussions.
_________________________________________

Balance- A stable arrangement of subjects within a composition.

Blind Contour- A blind contour is a drawing where you draw the contours of your subject without looking down at your paper. They very often resemble grotesque versions of the actual subject. 


Composition- Refers to the organization, arrangement, and combination of objects within the borders of a drawing space. Many "rules" define a good composition, but these rules are only guidelines. Your personal preferences and natural instincts are also important. 

Contour- Similar to a blind contour in the fact that you draw the contours of your subject, however you are 'permitted' to occasionally look down at your paper. Contour drawings tend to look more 'normal' compared to their blind counterpart.
The Floor Scrapers Study by Gustave Caillebotte

Studies for William Rush by Thomas Eakins

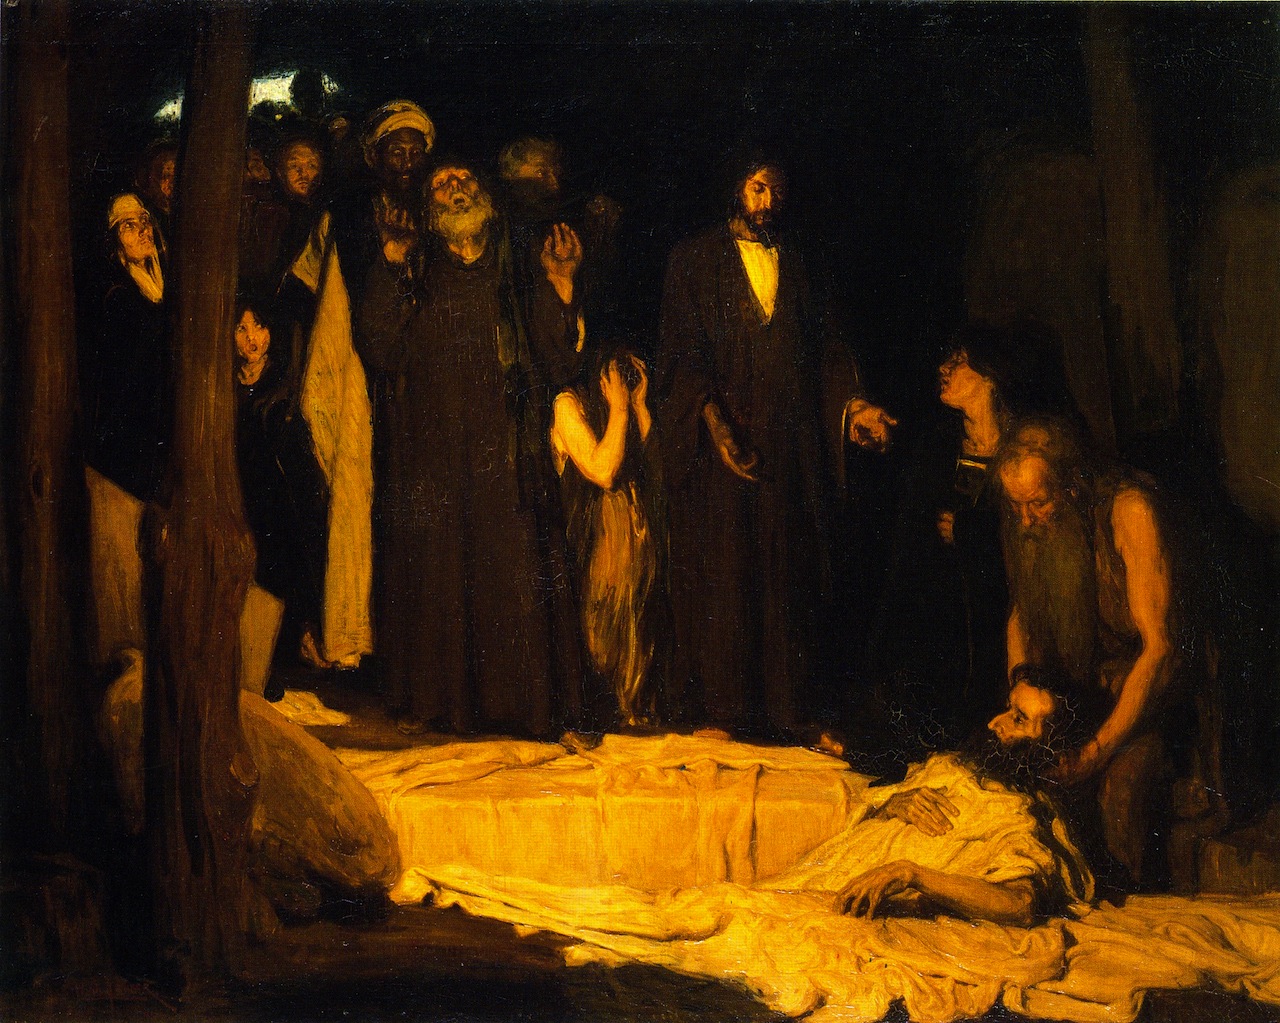
Contrast- Extremes of light and dark values that create shapes and patterns in your composition. In the first example below, the figure being in high contrast with the background helps her to stand out to the viewer, and in the second example, the high contrast of light and dark helps to imply dramatic lighting. 
General German Poster Exhibition for Trade Industry and Agriculture by Alphonse Mucha
The Ressurection of Lazuras by Henry Ossawa Tanner

Cross hatching- Cross hatching is a technique to add value to a piece using angled lines. The closer and more over lapped the lines are, the darker the area will be--and vice versa.


Focal Point-
A primary center of interest (or focus) in a drawing. 

Hatching-
Is a technique used to create tonal or shading effects by drawing closely spaced parallel lines. Hatching is especially important in essentially linear media, such as drawing, and many forms of printmaking

Femme de Dos (négresse) by George Seurat

Lines:
Navigation tools used to guide the viewer through the different elements of a drawing. 
  • Actual- bold black lines, may vary greatly in weight, character, and other qualities.
  • Implied- Are created by positioning a series of points so that the eye tends to automatically connect them. In a representational drawing, leading lines are usually implied, rather than actual. For example, in a realistic landscape drawing, a leading line can be a pathway, a river, a row of trees, or a fence. When properly rendered, the eye follows this line (or lines) directly into and through the drawing. Another example of emplied lines are lines of sight, or when you can tell what direction a person is looking based off of where their eyes are. 
  • Various types of lines put diverse emotions and moods in your  compositions. Remain conscious of the following effects lines can have in your drawings:

    • Curved lines reflect beauty, gentleness, and calmness. The s-curve denotes balance and grace.
    • Horizontal lines create stability, peace, and serenity.
    • Vertical lines reflect strength, grandeur, and dignity.
    • Diagonal lines offer a sense of movement and power. When diagonal lines meet to form an arrow, they can direct the viewer's eye. 


Negative Space- The space within your drawing not occupied by a focal point, important subject, or area of interest. In the below example, the space in the upper left hand corner is considered negative space. 
Booker T Washington by Henry Ossawa Tanner 

Overlapping- The visual separation of a drawing into foreground, middle ground, and distant space by overlapping (or layering) objects. Overlapping is very important when establishing depth of a composition.
The Gross Clinic by Thomas Eakins


Outline- A basic outline of your subject. Unlike gestures in that you do not get the sense that you are looking at a three dimensional object.

Proportion- The amount of space allocated to the various components of a drawing. In the below example, the proportions of the figures and their clothing is greatly exaggerated in the artists style. 
After the Arnolfini van Eyck by Fernando Botero
Texture- Texture can refer to the actual texture of the paper or support you're drawing on, or an 'implied' texture created from your pencil or pen.
The Starry Night by Vincent van Gogh 

The Golden Mean-Lecture 5


The Rule of Thirds is an artistic guideline to help keep your composition engaging and interesting. Below are some examples of famous artwork with the rule of thirds overlaid on top of them as well as a few videos to help further explain the concept.


In The Adoration of the Magi you can see that the majority of the figures heads as well as the horizon line falls on one of the guidelines. This helps to guide the viewers to the focal point of the madonna and child. 
The Adoration of the Magi by Raphael


In The Last Supper below you can see that the table top lines up with the bottom guideline, and overall is a very balanced piece with the center figure of Christ being the focal point. 
The Last Supper by Leonardo da Vinci


A pieces composition doesn't have to rely on lining up everything with the guidelines. In The Mona Lisa below, notice that the background and negative space of the figure has an almost symmetrical effect that works on balancing out the slight asymmetry of the figure. 
The Mona Lisa by Leonardo da Vinci


Hatching and Cross Hatching

Crosshatching and Hatching are both useful techniques to create a wide range of values.

Hatching marks are parallel to one another. You can create the illusion of value with hatching by placing the lines closer together or making them vary in thickness. Crosshatching marks are hatching marks that intersect and can be used to give objects form and depth.


Changing mediums can give a completely different feel when using crosshatch and hatch techniques.


Outline Drawing

Think of a outline drawing as the scaffolding of a piece. The things to hold it together to help you reach your goals. An outline drawing at it's most basic does away with the complexity of a value scale, while maintaining the complexity of hand-eye coordination.


It can sometimes help to imagine outline drawings as coloring book pages. Let's start simple:


There is no indication of value here; it is as flat as the paper it's drawn on. That's essentially what a outline drawing is. It should look like a two dimensional object. Let's get a bit more complex:


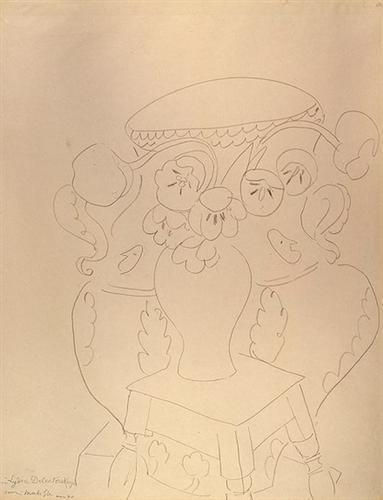
Still a relatively simple piece, but with a few changes. The subjects are more detailed and have a wider range of line widths and overlapping figures--all things that give it a more 3 dimensional appearance. Though more complex and detailed than the above flowers, this is still essentially a outline drawing. Let's move on to more relevant examples with a still life by Henry Matisse:


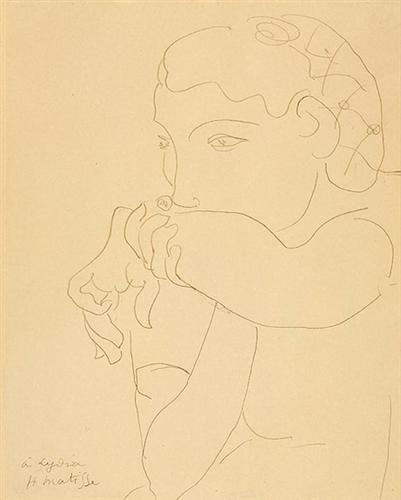
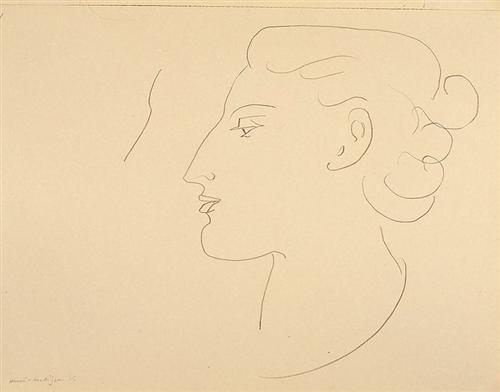
A few other more simple Matisse outline drawings:


Notice the similarities between all four pieces: the lack of shading and fine details. All the subjects have been simplified to their most basic outline.

An outline shouldn't be perfect and you shouldn't feel the need to erase your 'mistakes'. Just draw what you see in front of you. It's all about training your hand eye coordination.


Contour and Blind Contour

Contour Drawing is about learning to see. It’s a slow inspection of the subject, a careful examination of it’s parts, in a continuous line drawing. Try not to lift your pen/pencil off of the paper and look at your subject as much as you can.  This helps you train your hand eye coordination and also helps to translate things from a 3D space to a 2D space. 


Blind contour is similar to regular contour drawings, except instead of occasional glances at your paper, the goal is  to not look at your drawing at all. Only focus on the subject. For many beginners their blind contours will more resemble scribbles, but with time and practice, you will find your drawings having a bit more form. 

Here are some examples of contour drawings and blind contour drawings of the same subject to show the difference: